Introduction
Setting up a WordPress install can be a very daunting task for beginners. Imagine if your professor tasks you with having a virtual machine setup with WordPress on day 1. Imagine the confusion you’d have when they start mentioning “LAMP” and this weird Linux distro called “Cent OS”. In this tutorial I will guide you through installing Cent OS 7, and wordpress.
Configuring Your VM
When setting up WordPress, you’re going to need a virtual machine that meets these specifications:
- 4GB of ram
- 20GB HDD
- Bridged Networking
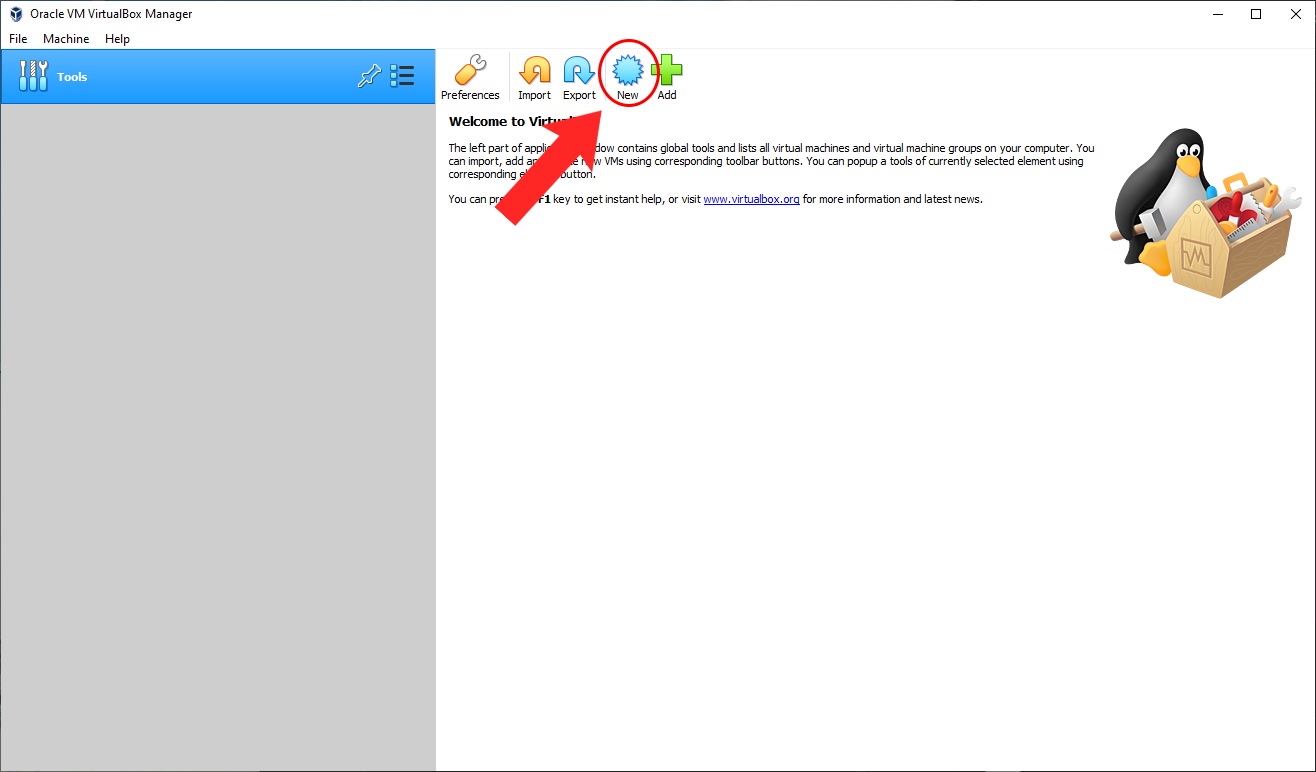
In this tutorial I will be using VirtualBox. Start by clicking on “New”.
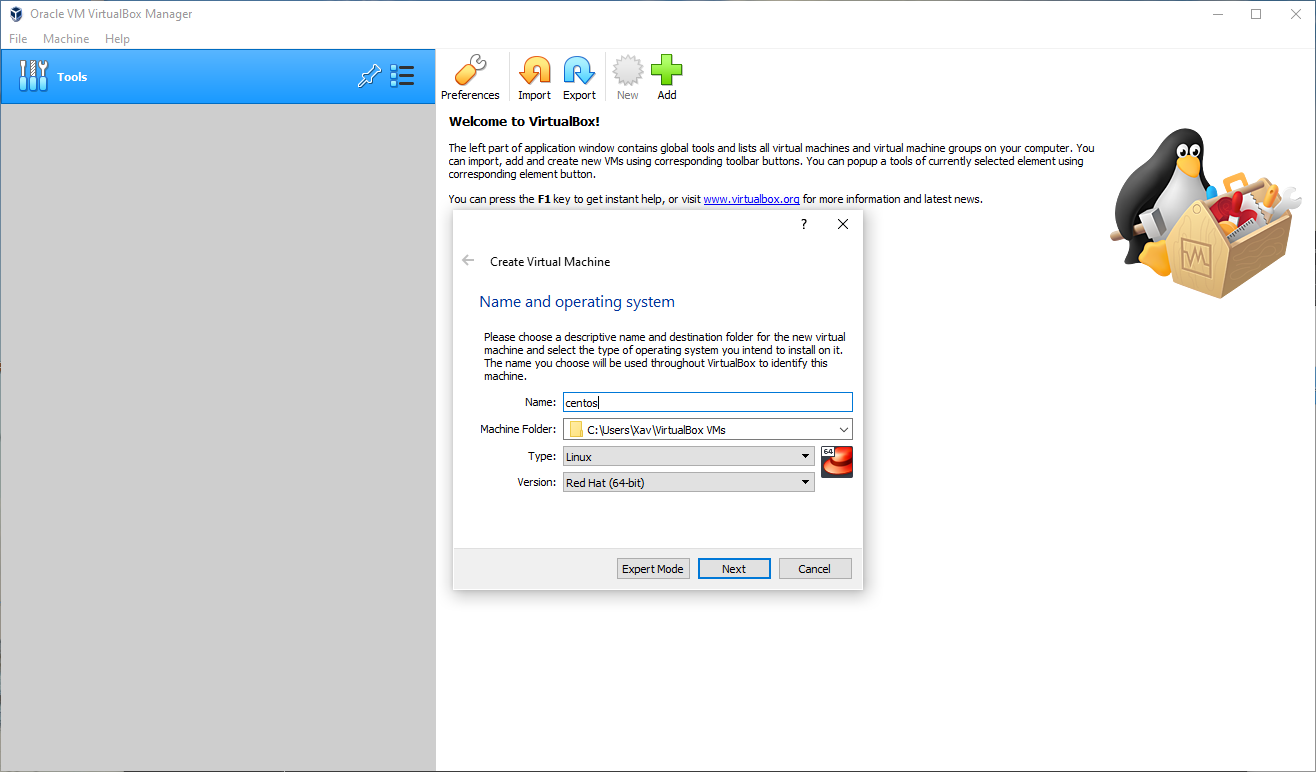
Start by giving a name to your virtual machine, and the location you want the files to be in. Make sure to select the correct type and version, that being Linux, and Red Hat (64 bit) respectively.
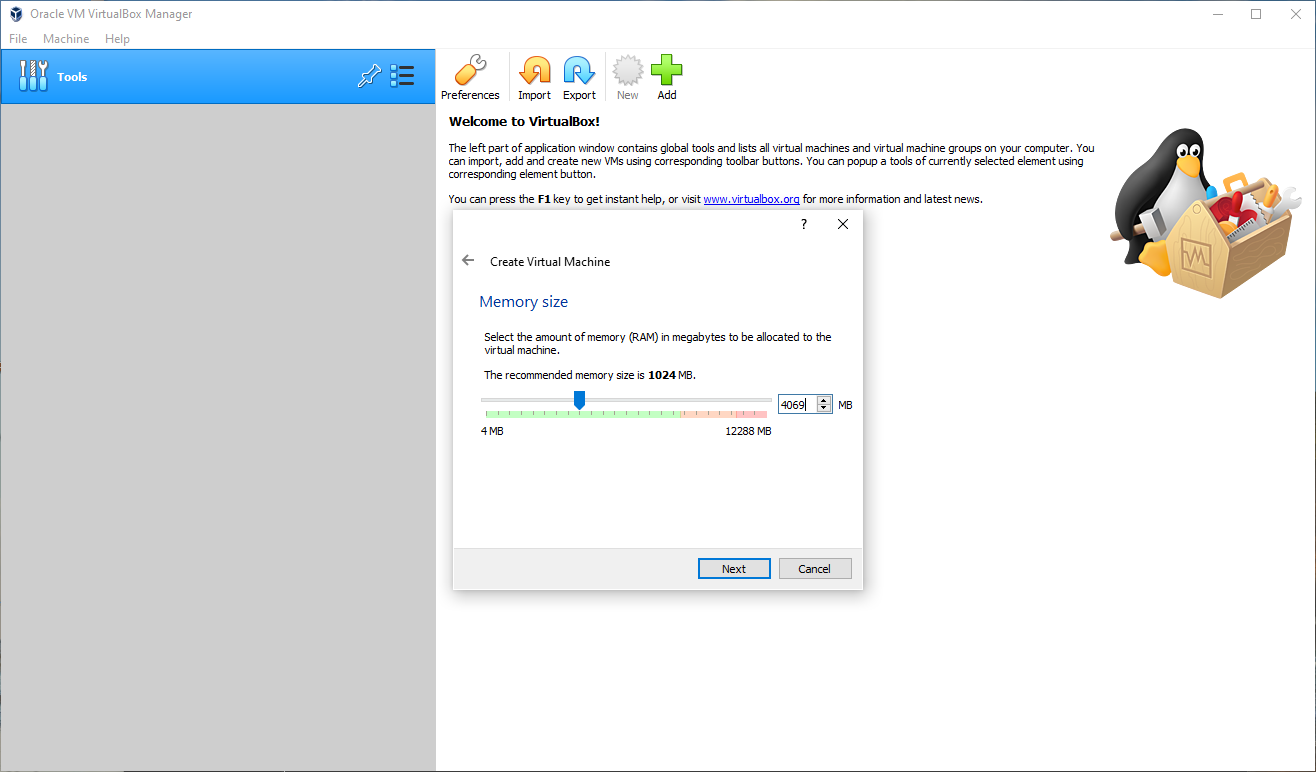
Next, allocate the correct amount of memory for your virtual machine. In our case, it is anything above 4GB. Keep in mind that VirtualBox expects you to type in the amount in MB, and if we’re mentioning ram sizes, they need to be in the power of 2. So for memory, we set it to 4096MB.
For storage we need at least 20GB of space.
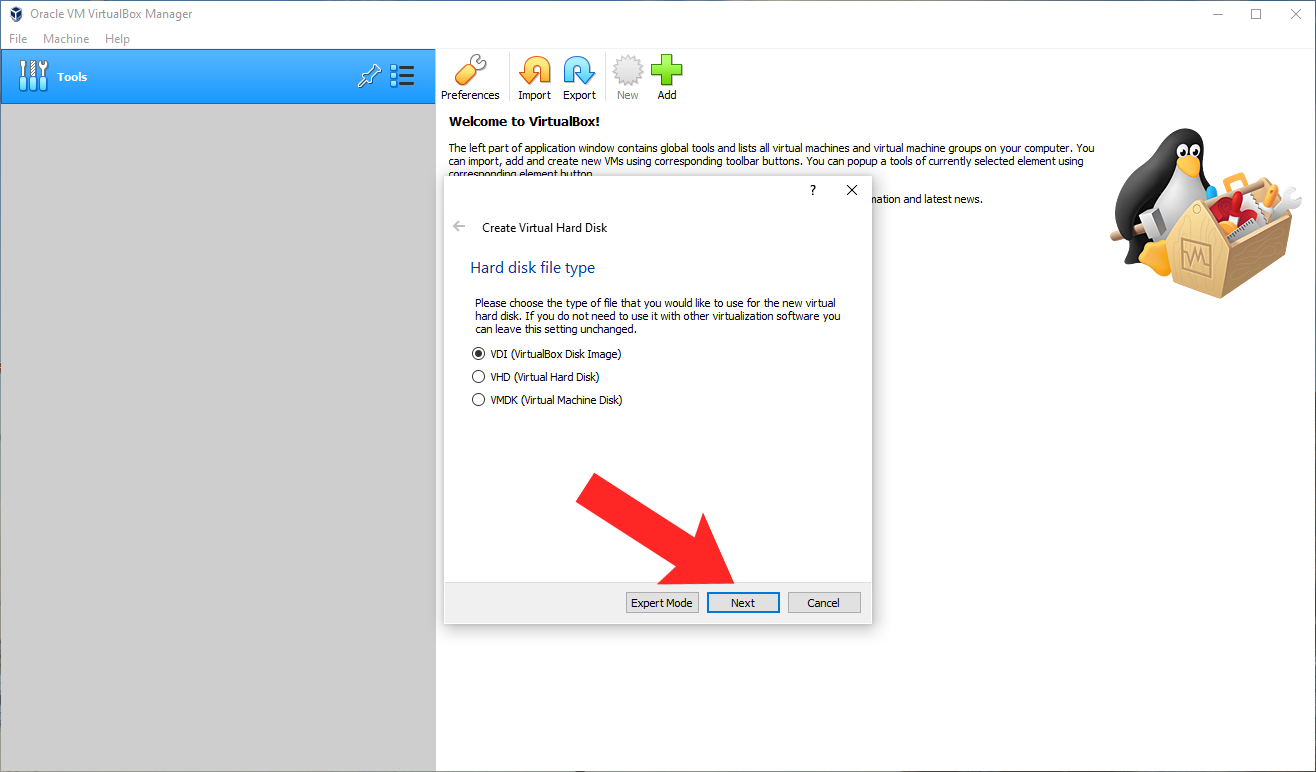
Here we specify the type of virtual hard disk to create. We can leave this as default and hit next.
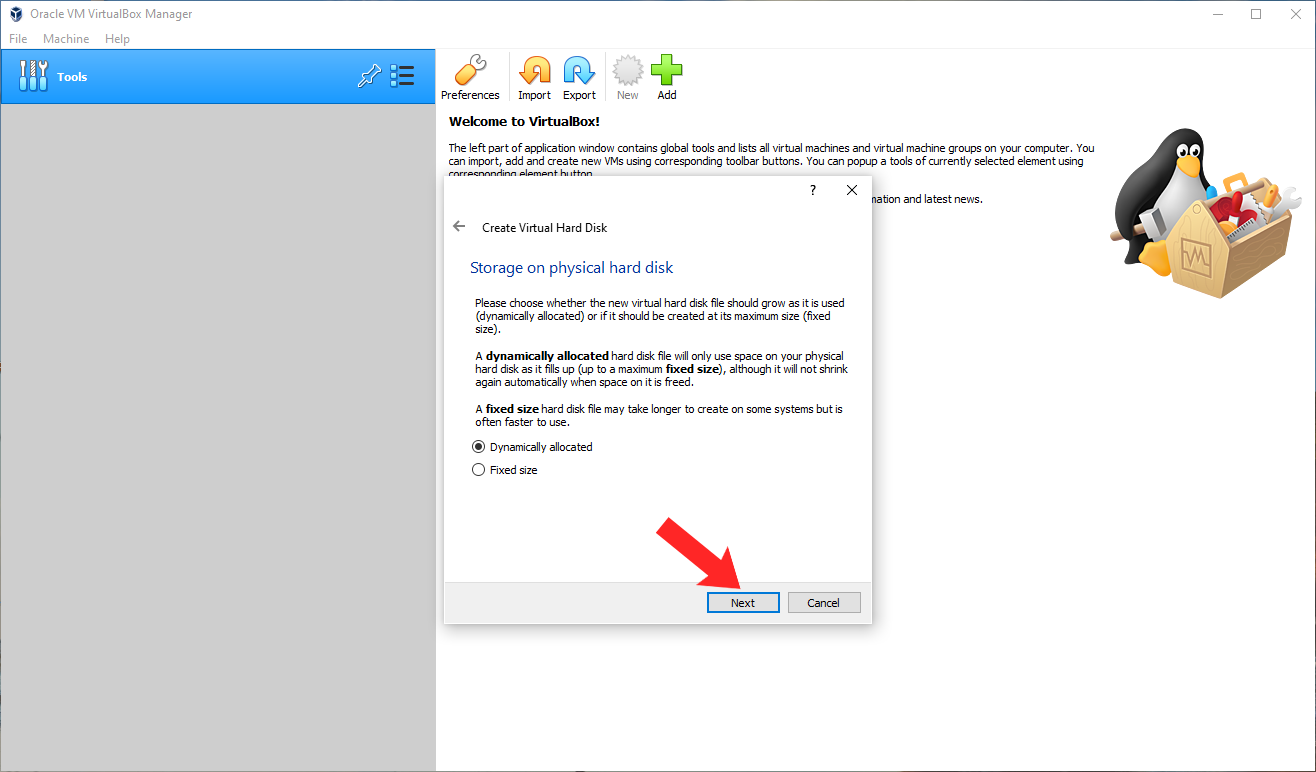
Next we want to make this dynamically allocated, just so that it will only take up how much is in the virtual hard disk and not just 20GB.
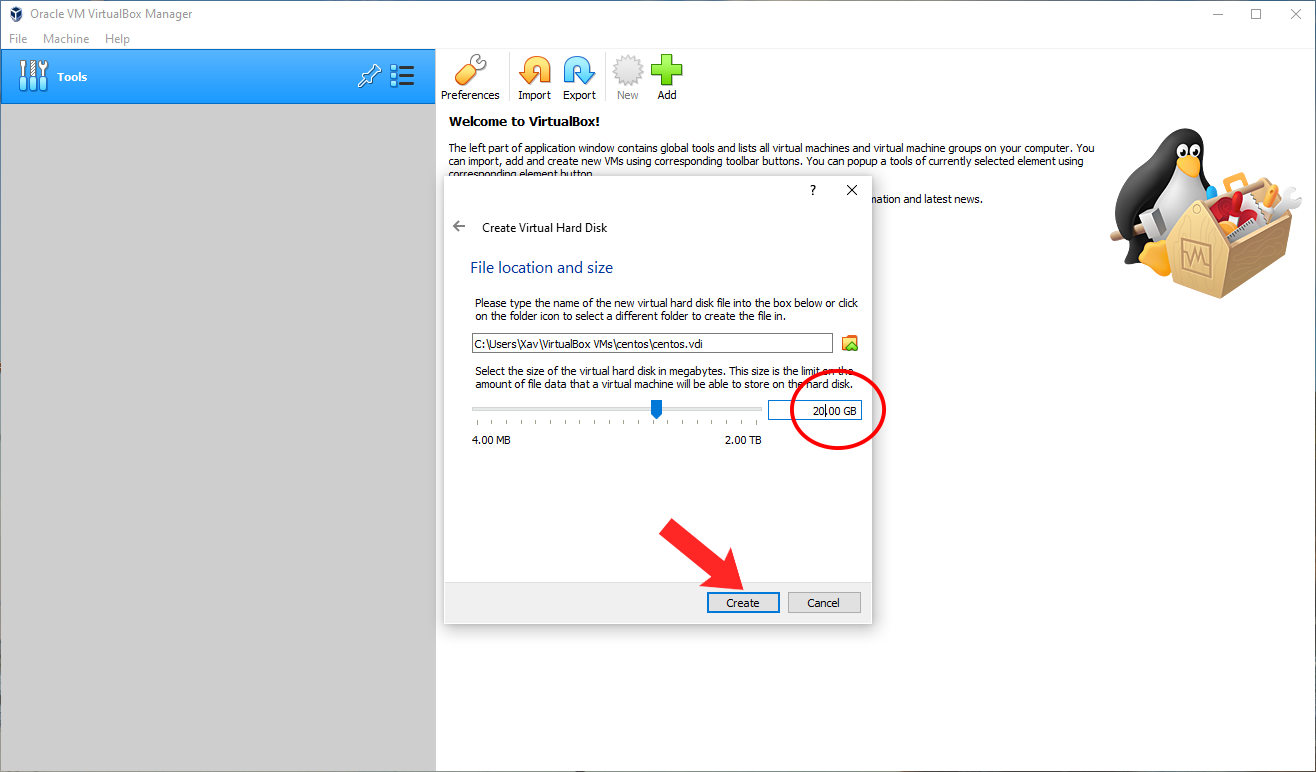
After that, we finally specify 20GB for the virtual hard disk.
After that we’re done, right? RIGHT??? No. We still need to make the VM have a bridged connection! You may ask why it’s oh so important to do this, I’ll explain. Usually, VM networking will use NAT. That means it will share the IP address of the host, and that (local) IP will only be available to the host and not anybody else on the network. With bridged, we can emulate a direct connection to the router. And here’s how to do it.
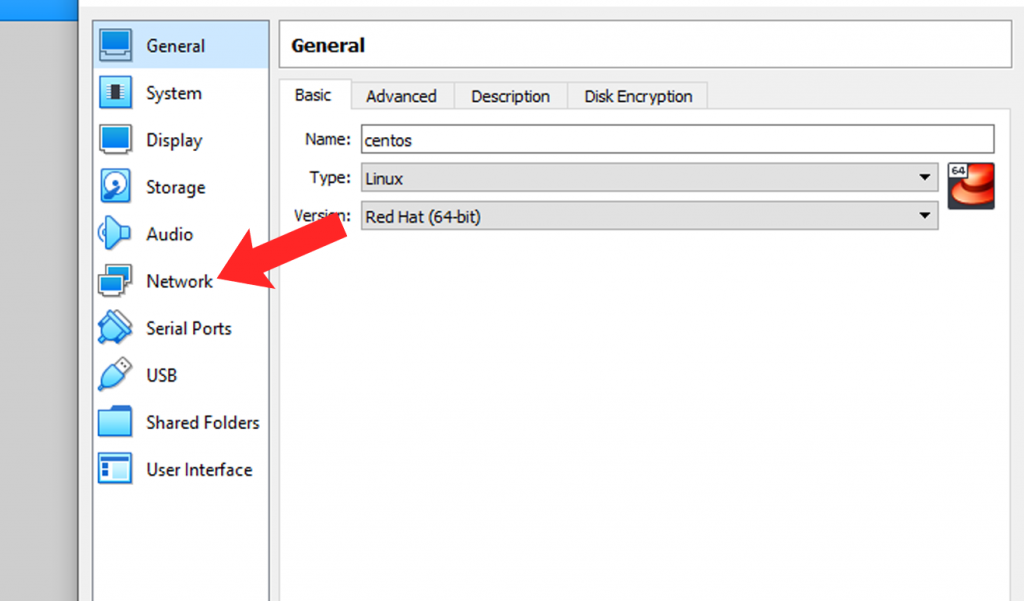
Select your newly created VM and hit the settings icon. Inside, locate the “Network” option and change the “attached to” option to bridged. And beside name, make sure it’s using the right connection.
L – Linux
This is the first part of a “LAMP” stack. It’s actually an acronym that stands for something, but we’ll learn that along the way. L is for Linux, and in this case, we will be using a distro called “Cent OS 7″. For this tutorial we are going to be using the net install version. I like to use the net install version because of two things. 1. It assures that I have an internet connection. 2. Because I said so. Start by downloading the net install from the hyperlinked text.
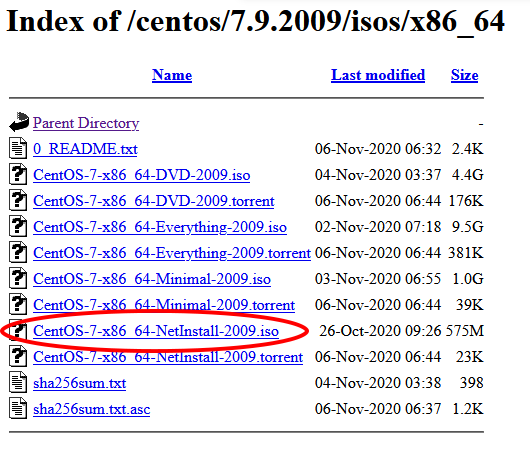
Then we go back into Virtualbox, select the VM we just created, and press the green start arrow. When you first start the machine, it will tell you to select a start up disk. Now we’re going to point Virtualbox to our newly downloaded ISO. Follow the screenshots below to see how I did it.
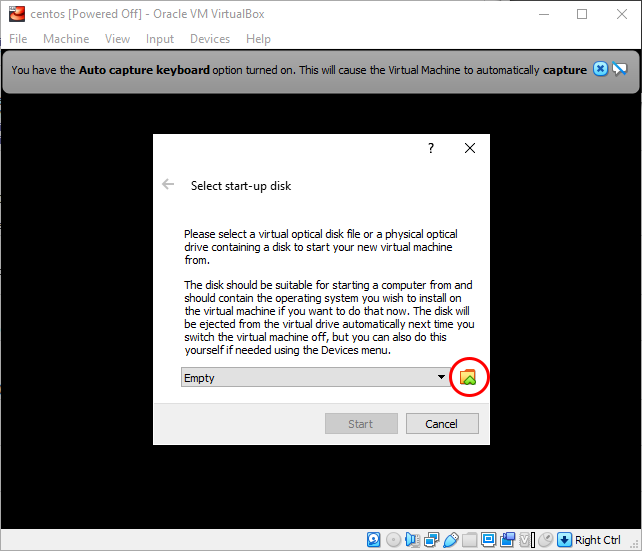
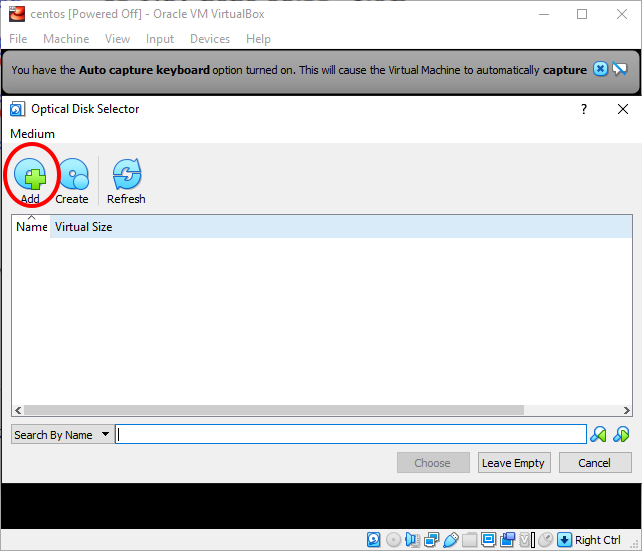
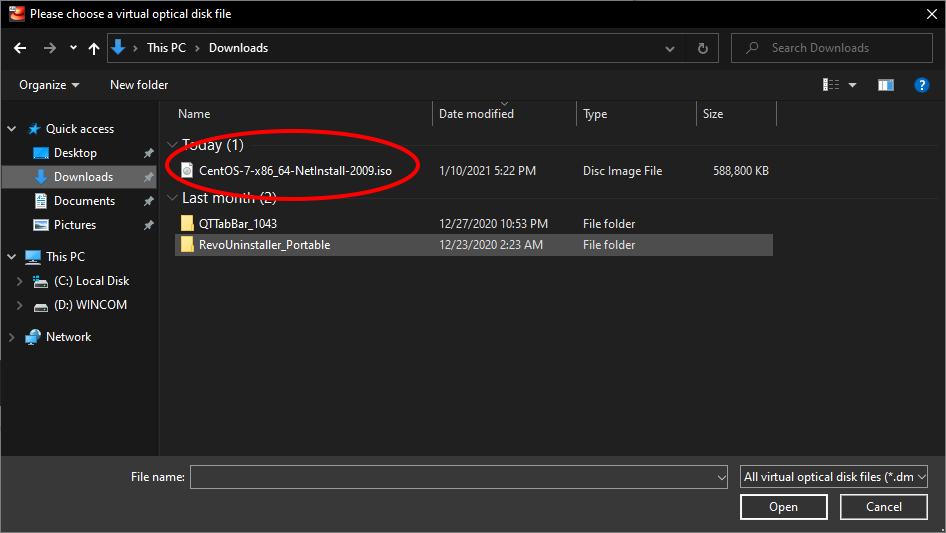
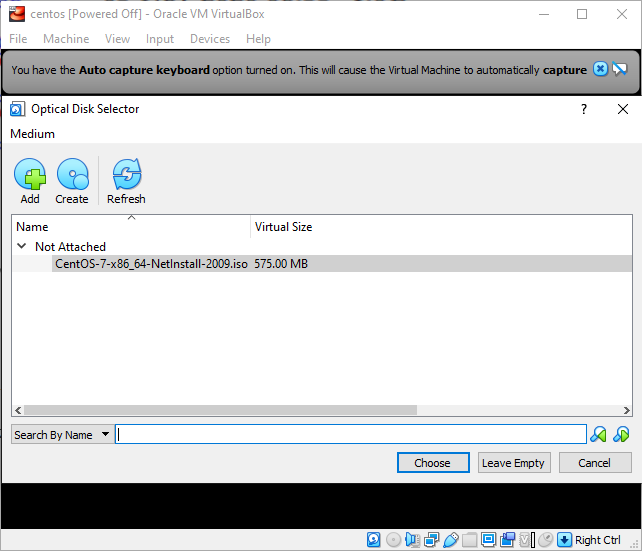
The VM will begin to boot up using the provided ISO. When the first prompt appears, just press enter and wait.
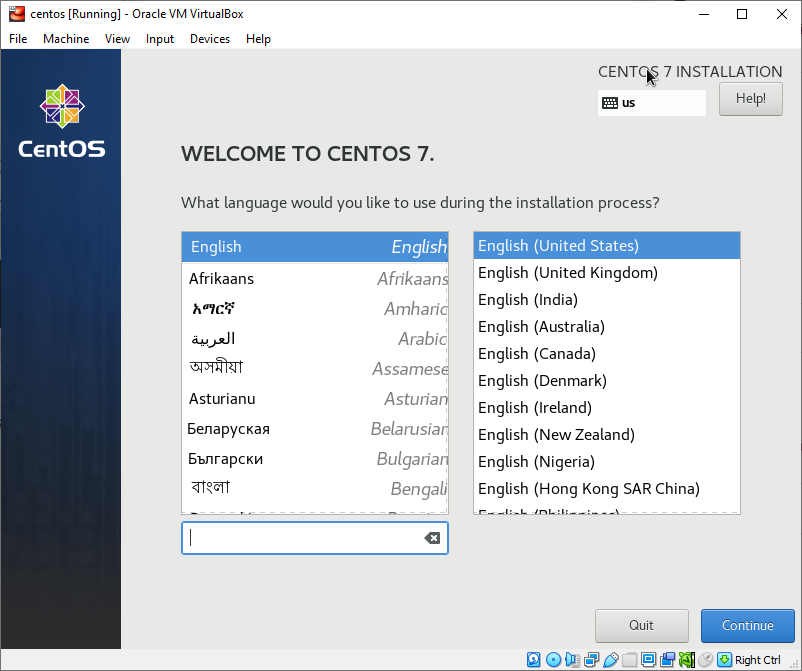
You should now see the welcome screen. Go ahead and click on continue unless you need to change the language and whatnot.
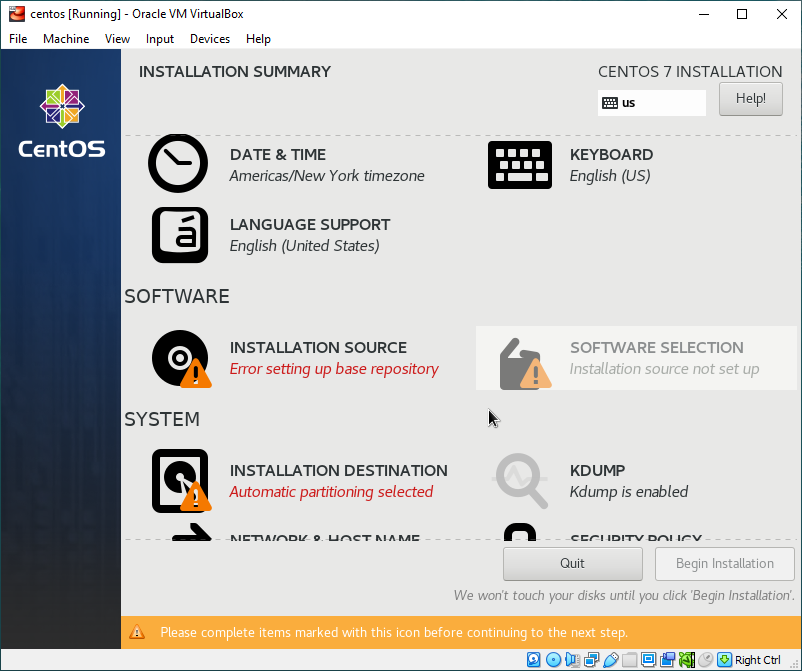
Here you will see all these requirements we need to fulfill before we begin installing Cent OS
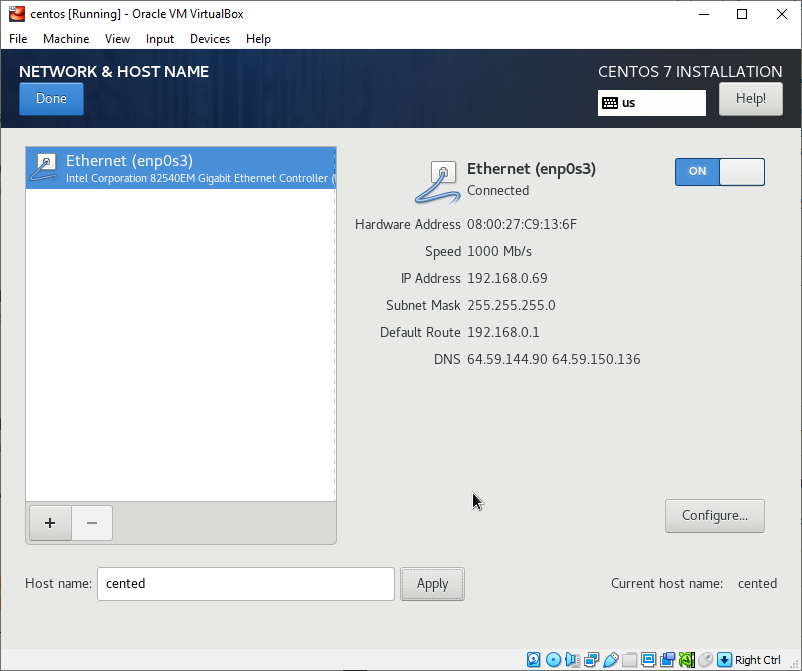
Start with the “Network & Host name” section. Turn the switch for Ethernet to on, and set up a host name if you’d like. After that, click on “Done”.
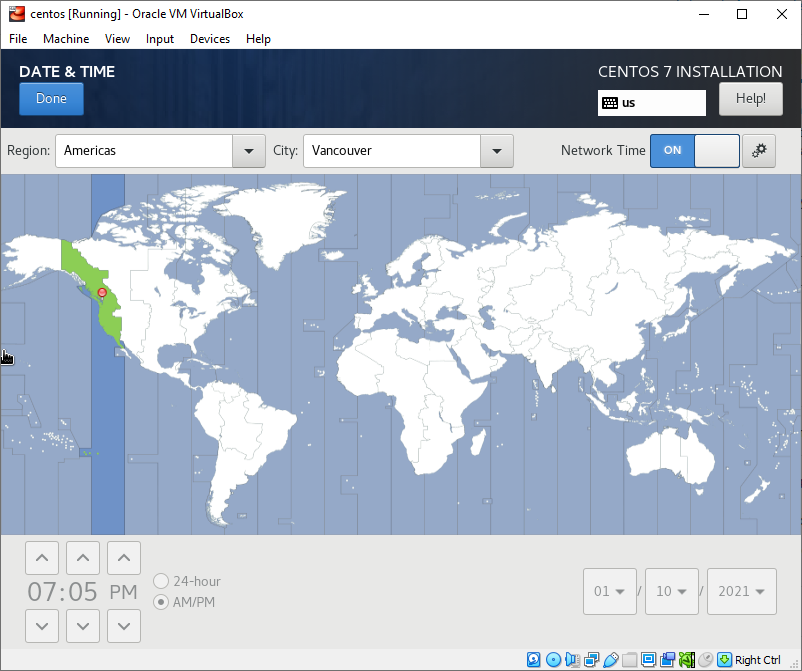
Next I go to “Date & Time”, select my region, make sure Network Time is on, then I hit done.
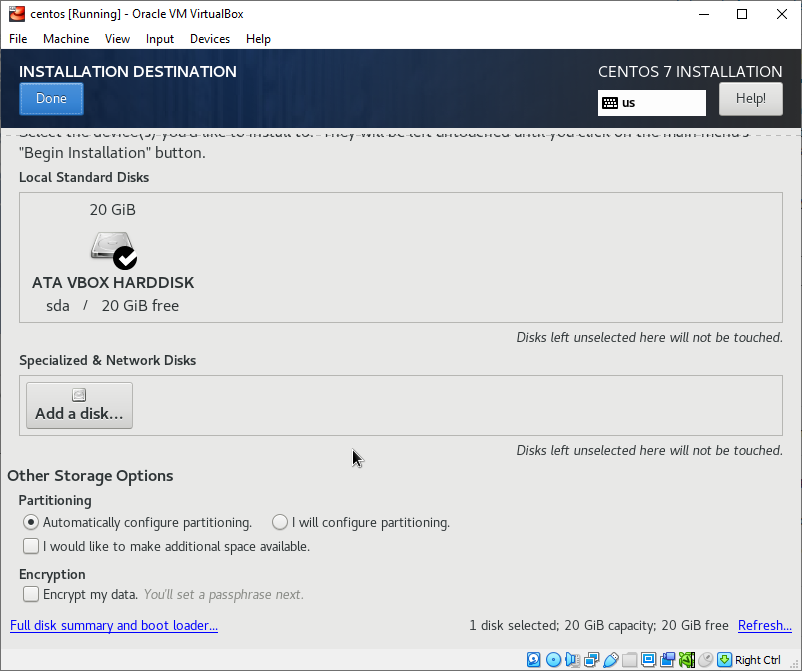
For installation destination, just make sure the “automatically configure partitioning” option is selected, and hit done.
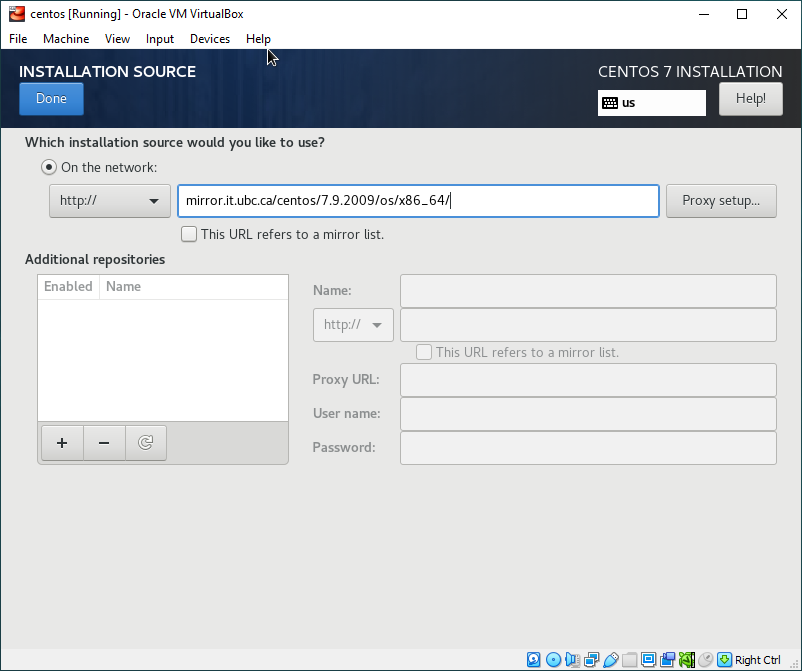
Now here comes a fairly tricky part. Here we configure where we are going to get all the packages for the system. For this instance, I use the UBC mirror, but you can find a mirror closest to you here. Once you have your mirror selected, navigate to 7.9.2009, then os, then finally x86_64. That is the link you will be using for this step. Once you’re finished click done.
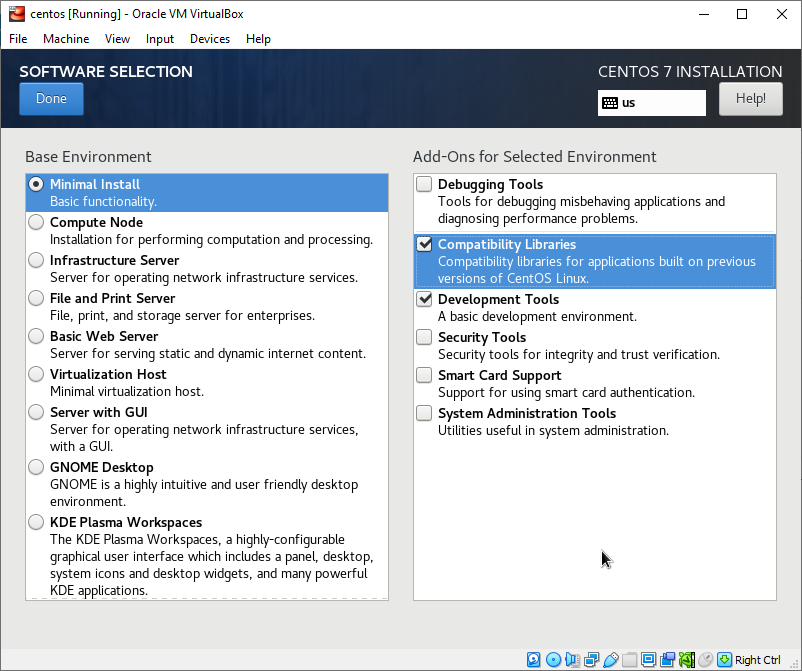
Now under software selection, I select minimal install. The reasoning for this is that a graphical user interface adds unneeded difficulty. With a a Command Line Interface, everything is there, compared to a GUI which buries it’s settings under so many abstraction layers. There is also an option for Basic web server. However it installs the wrong version of PHP, and again adds unneeded difficulty. With minimal, we know exactly what is on our system. Click done when you’re finished.
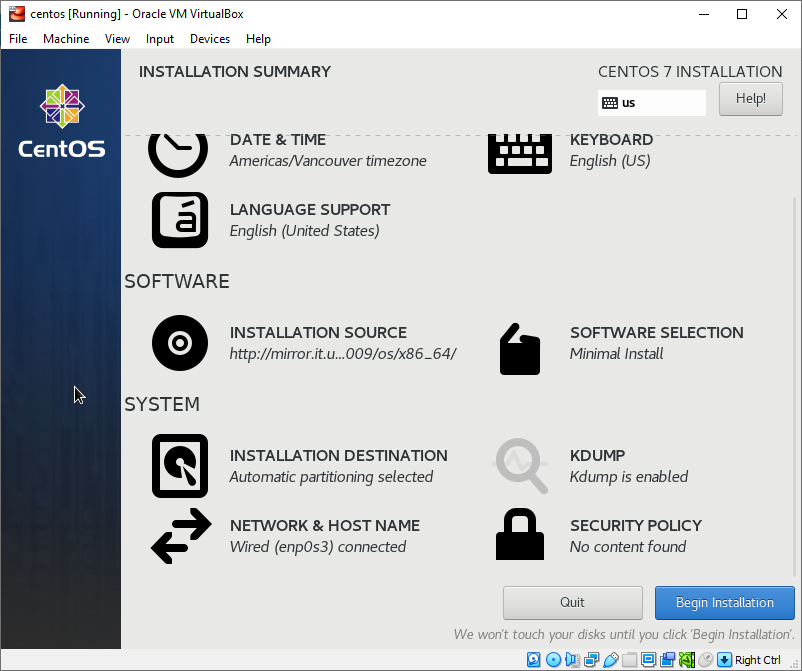
When all of it looks good, click on the blue “begin installation” button.
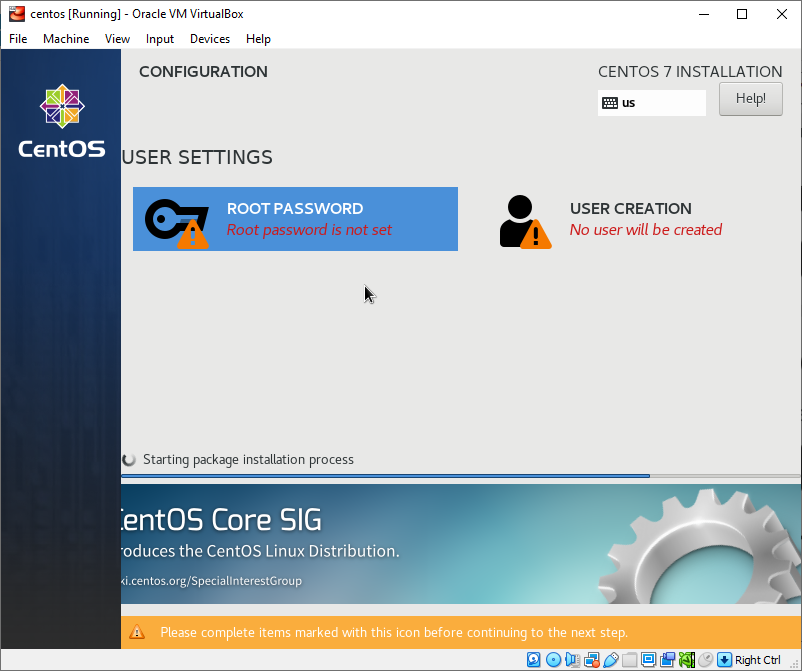
Now as it installs, you’re going to want to set up a root password. You could also create a user, but in this tutorial we are only going to use the root user. Click on Root password, set a strong password, and hit done.
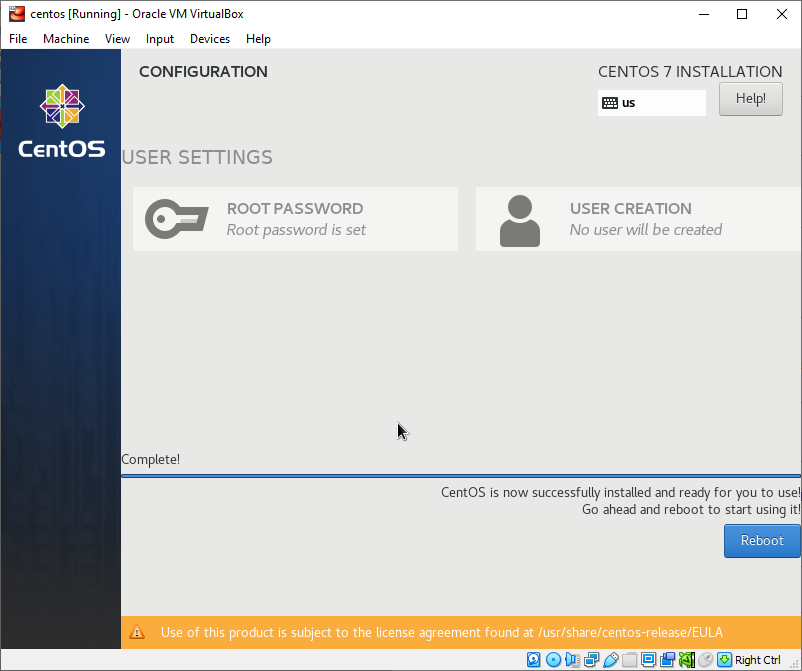
Once everything is done. Hit reboot.
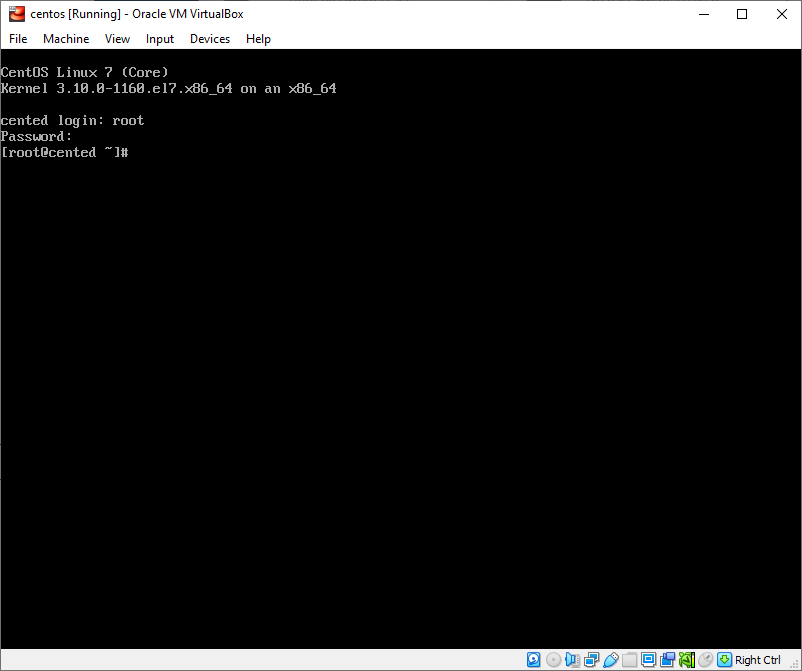
When the prompt appears, login as “root” and enter your password. We now have the Linux part of LAMP!
A – Apache
Now we install Apache. This will be our HTTP server used for serving up web pages. But before we start installing, we’re going to make sure that we are all updated. Run the command below to do so.
yum clean all && yum updateWhen logged into a user account that has admin privileges, you’re going to need to put “sudo” before yum. And make sure to respond with “y” and pressing enter if it prompts you for anything.
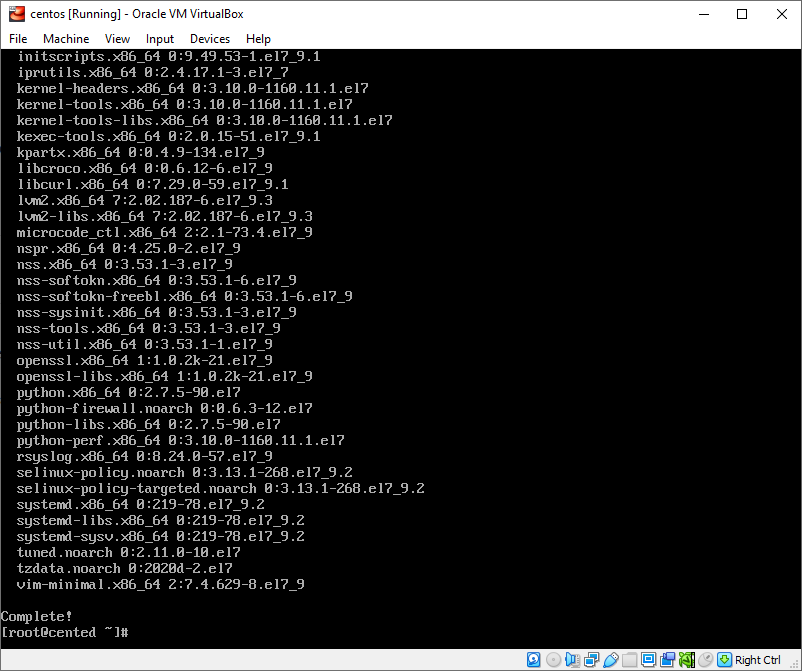
If everything is successful, you should see the prompt say “Complete!”
Now that we’ve updated and cleaned everything, we can finally install Apache. Start by running the following command.
sudo yum -y install httpdAfter it installs, we need to enable the http and https protocol through our firewall.
firewall-cmd --permanent --add-service=http -add-service=https&&firewall-cmd --reloadYou’ll notice my usage of &&. This just means we are running 2 commands one after the other. Anyways, now we have to start and enable the service.
systemctl start httpd&&systemctl enable httpdNow that we’ve started the Apache service. We can test the functionality of the server. Type the following command to see your ip address.
ip addr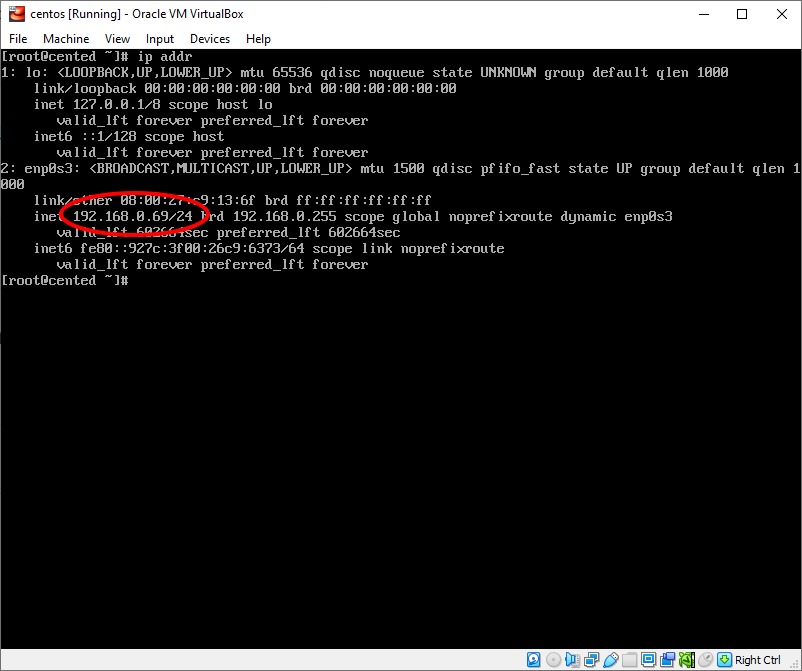
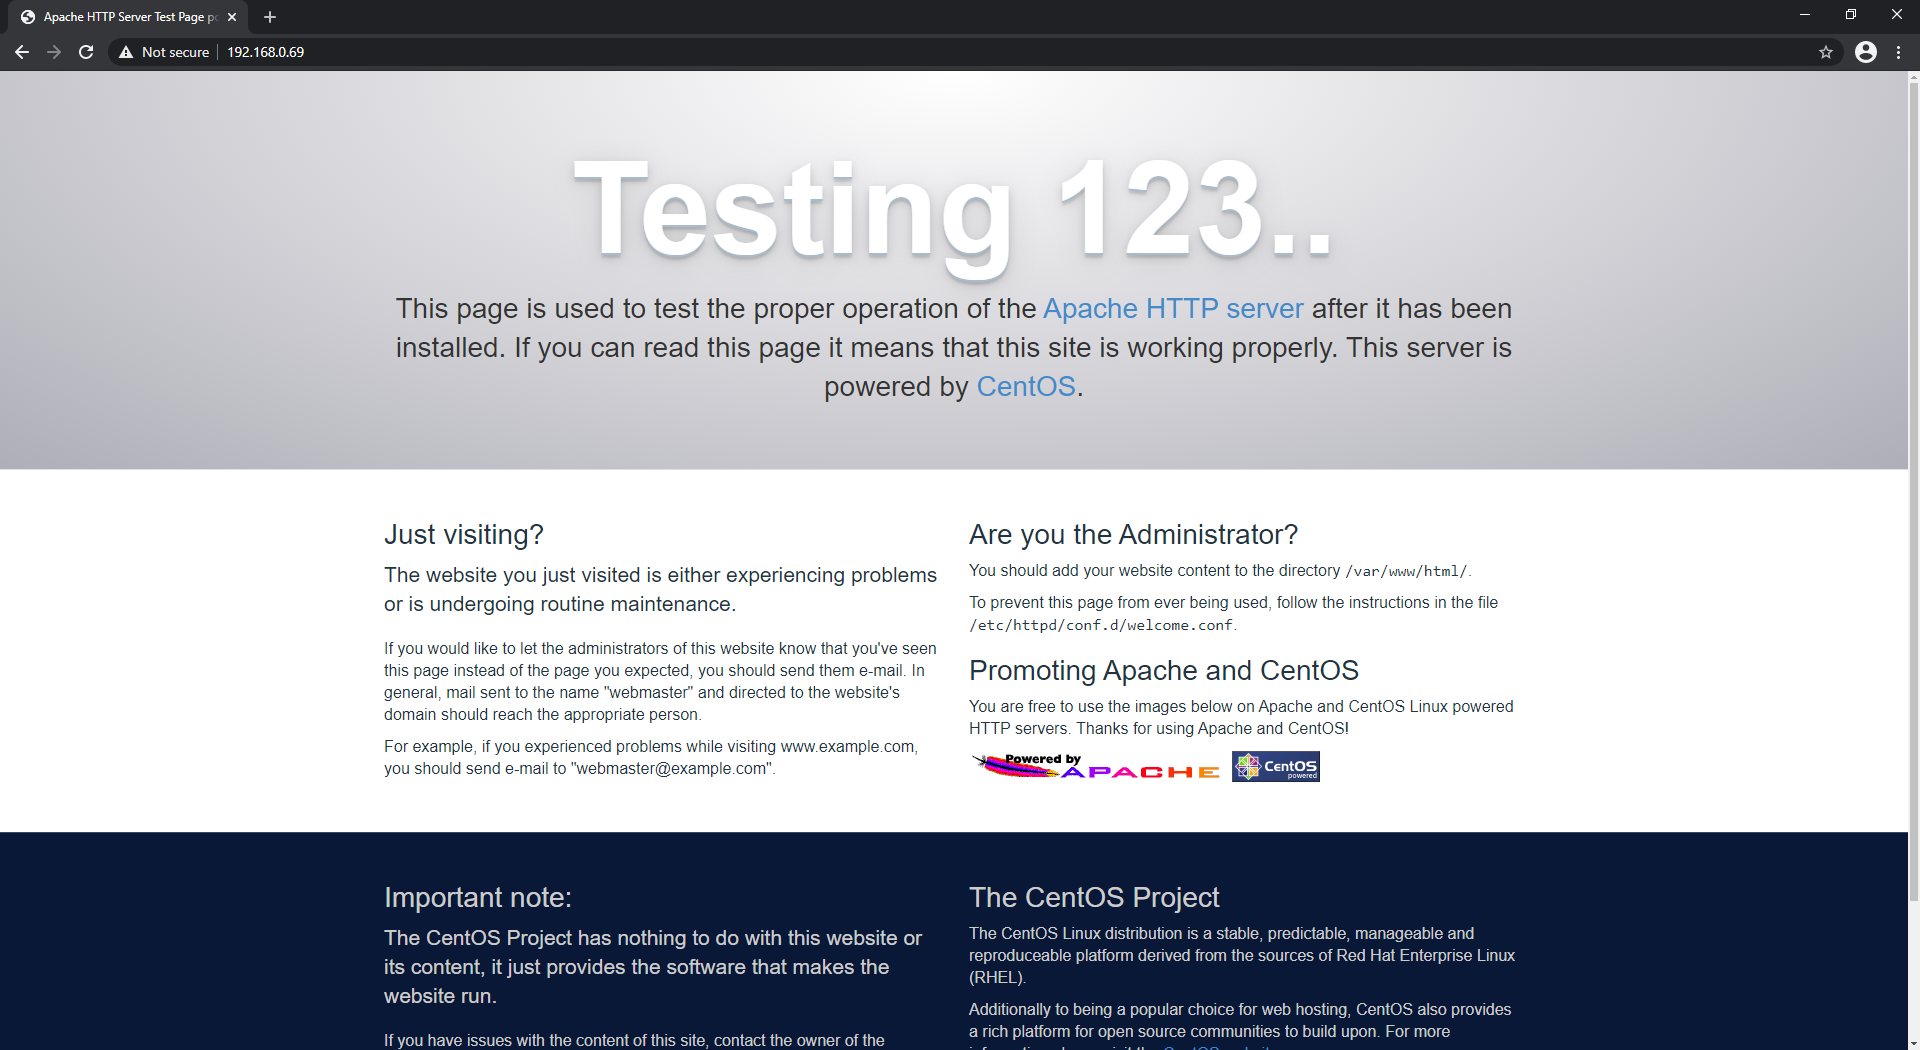
Next, try typing the ip (without the /) into your web browser. If all is well, you should see the following web page.
M – MariaDB
Now we install MariaDB, we will be using this as our database for WordPress. Start by installing it.
yum -y install mariadb-serverNext we want to start the service
systemctl start mariadbNow we secure it/run the basic setup for mariadb.
mysql_secure_installationWhen you run it for the first time, make sure you hit enter when it asks you for a root password, as you don’t have one setup yet. For the next option, set up a meaningful root password. For the next options, hit “y” until everything is complete.
systemctl enable mariadbP – PHP
Now comes for the most command heavy part of LAMP. PHP is crucial for the installation of wordpress, it’s a web scripting language that wordpress uses. Type out the commands one by one
yum -y install centos-release-scl.noarchyum -y install rh-php72 rh-php72-php rh-php72-php-mysqlndln -s /opt/rh/rh-php72/root/usr/bin/php /usr/bin/phpln -s /opt/rh/httpd24/root/etc/httpd/conf.d/rh-php72-php.conf /etc/httpd/conf.d/ln -s /opt/rh/httpd24/root/etc/httpd/conf.modules.d/15-rh-php72-php.conf /etc/httpd/conf.modules.d/ln -s /opt/rh/httpd24/root/etc/httpd/modules/librh-php72-php7.so /etc/httpd/modules/systemctl restart httpdNow we have LAMP stack. Next comes the setup for wordpress.
WordPress
Start by getting the wget package
yum -y install wgetWe use wget to grab files from the internet without a web browser. We need this to grab the wordpress package. Now we grab the package from the internet by doing the following.
wget http://wordpress.org/latest.tar.gzNow we setup the database for wordpress.
mysql -u root -pWhen prompted, input the password you used for the mariadb install.
Now inside mariadb, type the folliwing commands, don’t forget the ; at the end of every statement.
CREATE DATABASE wordpress;I use a generic username and password below. Replace “xav” and “Pa$$w0rd” with whatever you want. however in the next steps, I will be using “xav” and “Pa$$w0rd” as the username and password
CREATE USER xav@localhost IDENTIFIED BY 'Pa$$w0rd';GRANT ALL PRIVILEGES ON wordpress.* TO xav@localhost IDENTIFIED BY 'Pa$$w0rd';FLUSH PRIVILEGES;exit;Next we extract the archive we downloaded with wget from earlier with the following command.
tar -xzvf latest.tar.gzNow we transfer the extracted files to the proper directory so that apache can see them.
rsync -avP ~/wordpress/ /var/www/html/Now we need to be able to upload files to our wordpress site, so we create the proper directories.
mkdir /var/www/html/wp-content/
mkdir /var/www/html/wp-content/uploads
Now we grant permissions to apache to access wordpress
chown -R apache:apache /var/www/html/*And now we configure wordpress with our database. Start by navigating to the proper directory
cd /var/www/htmlAnd now we copy the sample config file.
cp wp-config-sample.php wp-config.phpNow we need to edit the file to replace it with our own database settings. Usually we would use vim or nano. But I will be using sed to replace it without a text editor. Replace “xav” with the username you set for the database. Replace “Pa$$w0rd” with the password you used to create the database user.
sed -i 's/username_here/xav/g' wp-config.php
sed -i 's/password_here/Pa$$w0rd/g' wp-config.php
sed -i 's/database_name_here/wordpress/g' wp-config.php
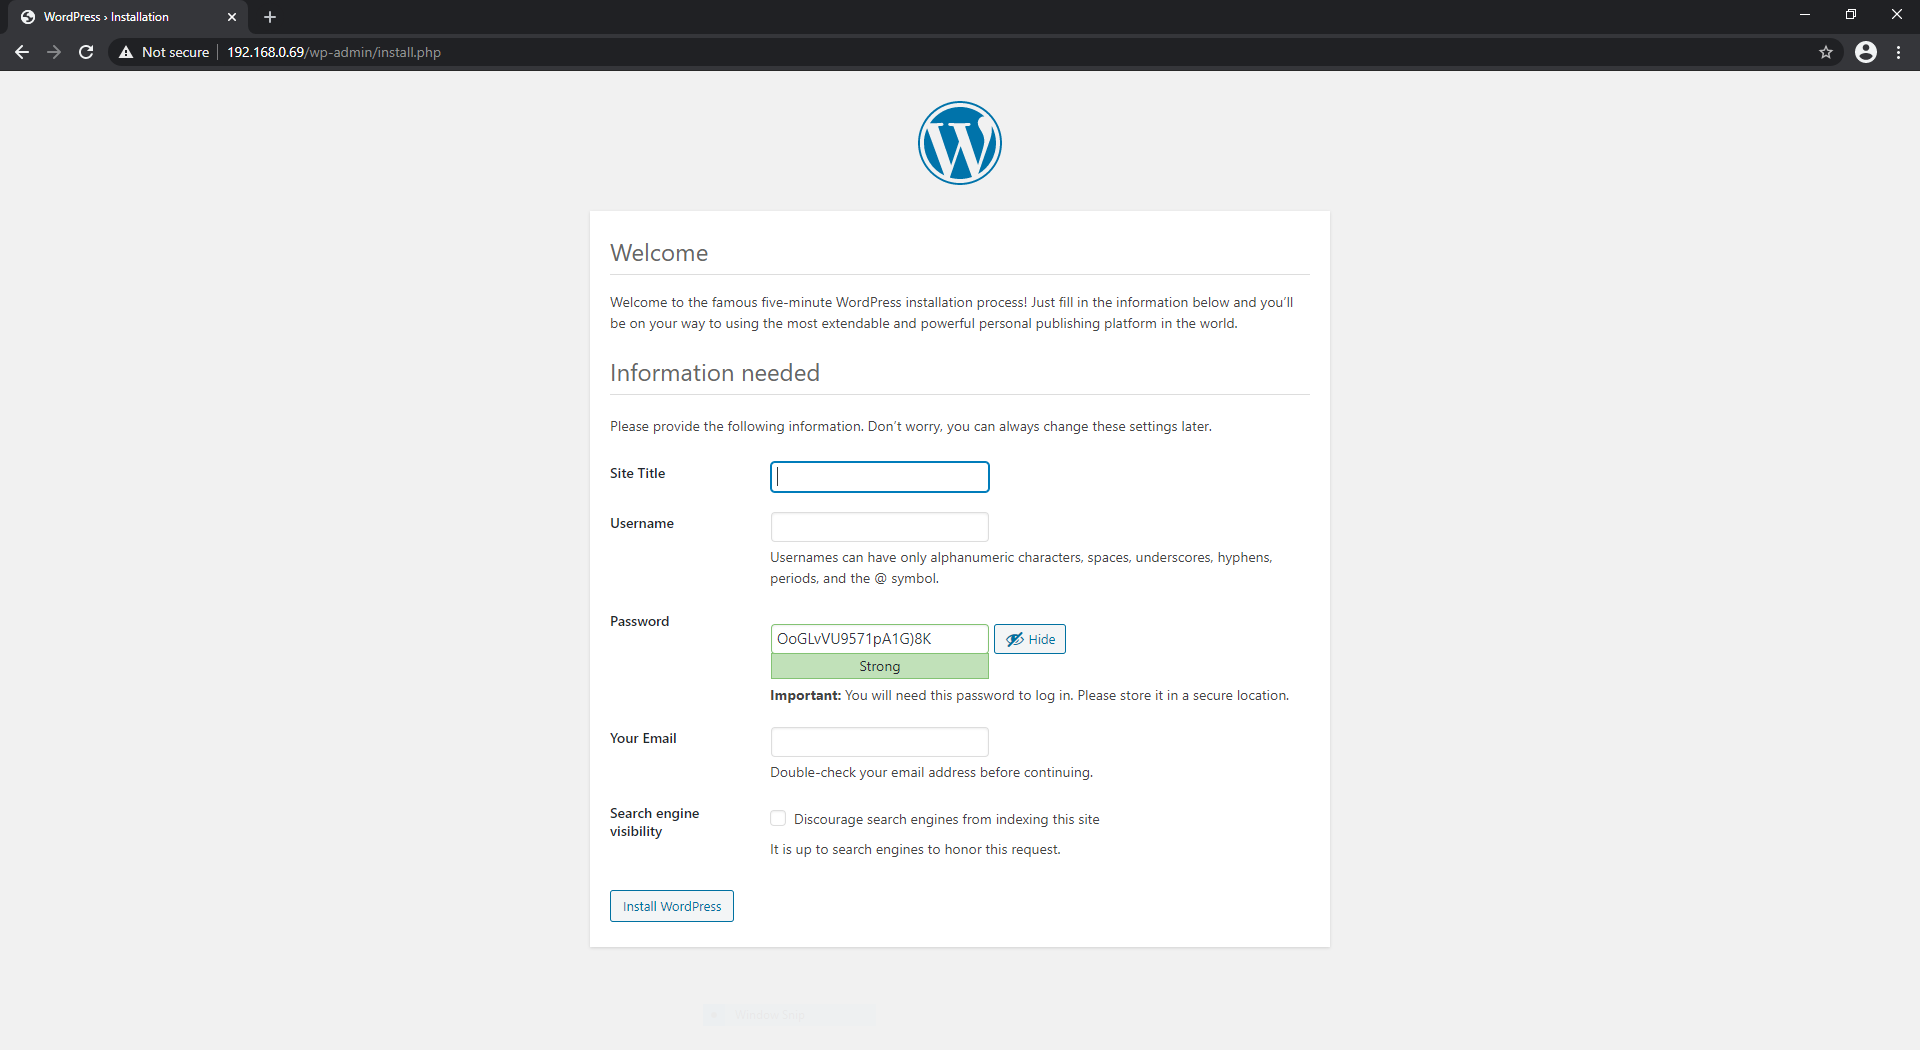
Now we finally see if wordpress is working. Go to the ip you typed earlier to see if apache was working, then add /wp-admin. Like so in your web browser:
192.168.0.69/wp-adminIf all went well, you will see the landing page, and you can use wordpress with all it’s graphical glory!
